This document is a guide for creating CI/CD Pipeline with AWS CodeDeploy, CodePipeline, Amazon Lightsail, and Bitbucket.
Guide from the official AWS Compute Blog: Using AWS CodeDeploy, AWS CodePipiline, and Amazon Lightsail
Prerequisites
- Create a
SetupVariables.txtfile and copy contents of theSetupBootstrap.txtto your newly created file. (Link to SetupBootstrap.) - A Bitbucket Account.
- Git installed in your local machine.
- AWS account with previledges to create resources.
***Note: Copy the role names and other information in the SetupVariable.txt file for your reference.
Create IAM service role
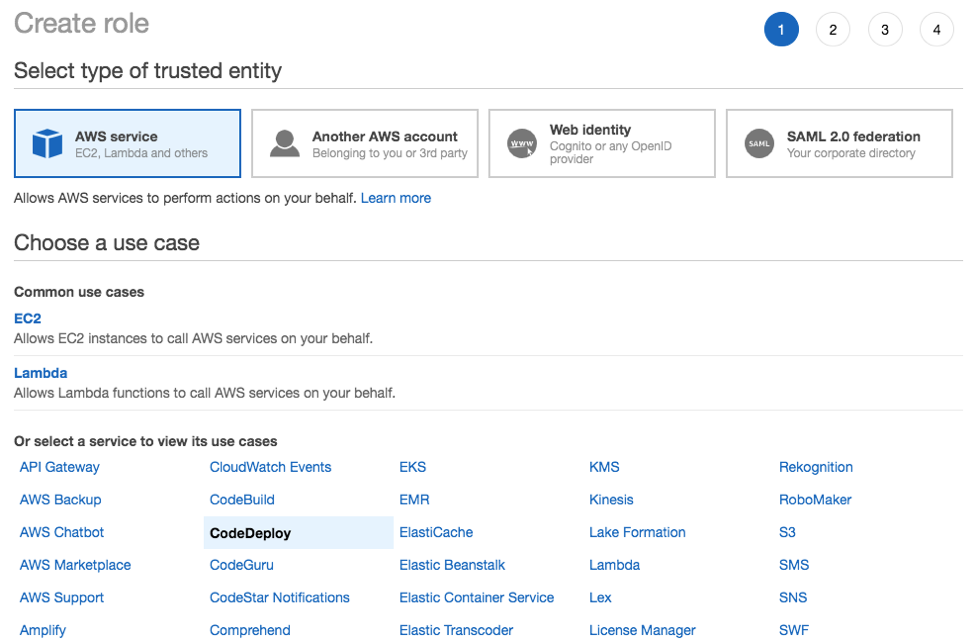
- Navigate to AWS Identity Access Management (IAM) and create a service role with the following information:
- Type of trusted entity: AWS service;
- Use case service: CodeDeploy
- Use case: CodeDeploy and click Next until the **Create role **page is reached

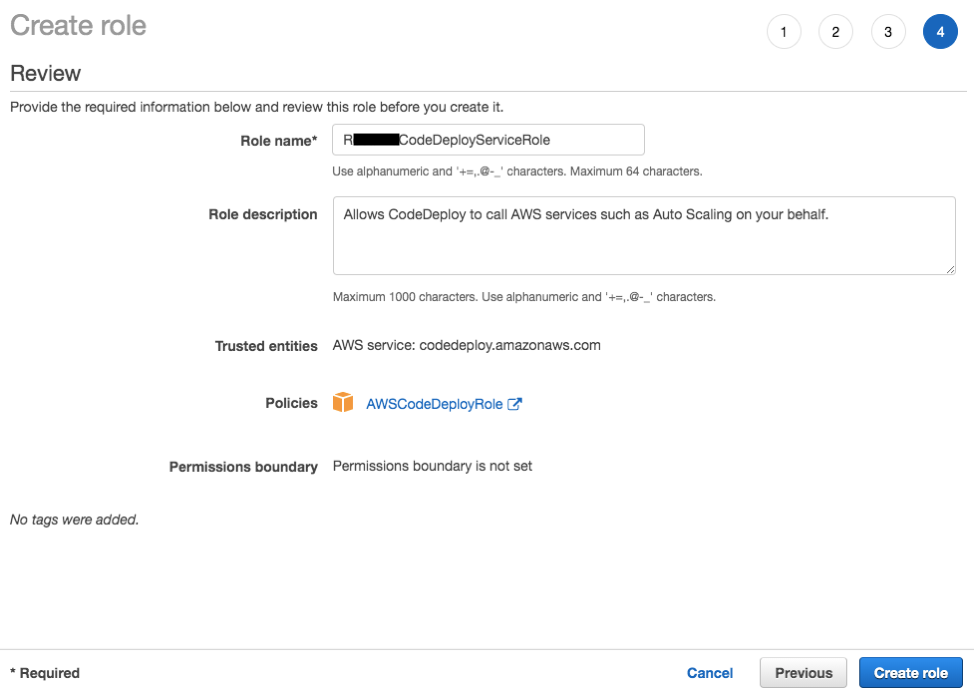
- On the Create Role Page, enter your role name. (for example,
RxxxxCodeDeployServiceRole) and click Create role.
Create an S3 bucket
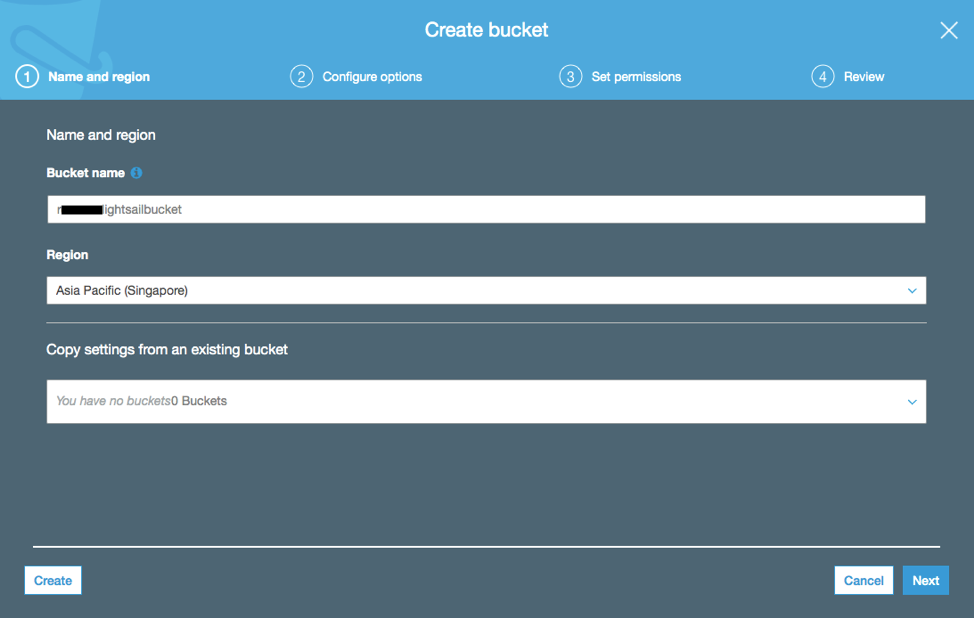
- Navigate to Amazon S3 Bucket Console and create a bucket by filling up the Bucket name (rxxxxlightsailbucket) and selecting a region. Click Next to proceed.
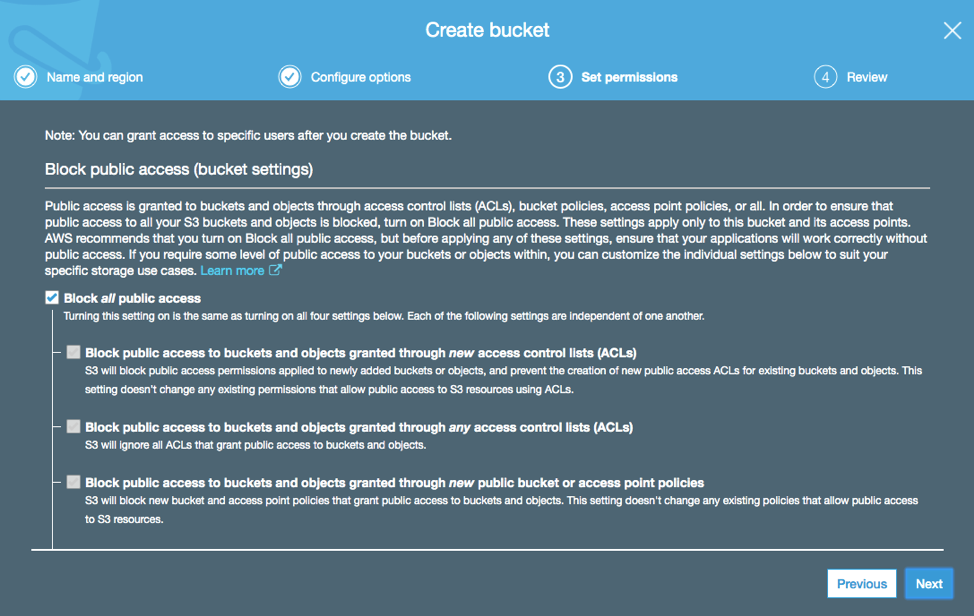
- Make sure that the Block all public access is checked. Click Next until Create bucket.
Create an IAM Policy
-
Navigate to the Policy Section of the AWS Management Console and Create a Policy.
-
Click on the JSON tab and paste the code from below:
1
2
3
4
5
6
7
8
9
10
11
12
13
14
15
{
    "Version": "2012-10-17",
    "Statement": [
        {
            "Effect": "Allow",
            "Action": [
                "s3:*",
                "codedeploy:*"
            ],
            "Resource": [
                "*"
            ]
        }
    ]
}
-
Click Review Policy, enter your policy name. (For this example,
RxxxxCodeDeployS3BucketPolicy), and click Create policy.
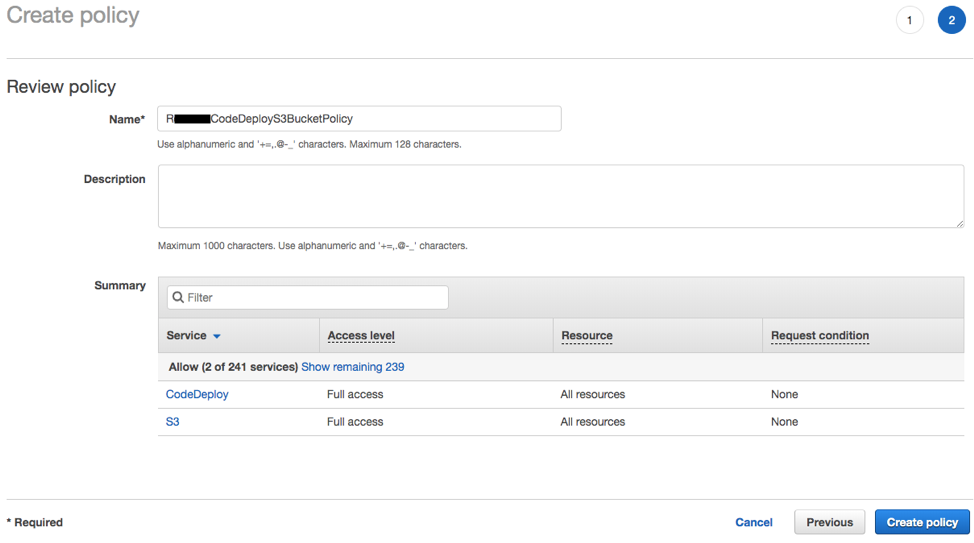
Create an IAM User
- In the same IAM Console, click on Users, and Add User. Input your desired IAM User name (
RxxxxLightsailCodeDeployUserin this example), and check Programmatic access. Click Next: Permissions.
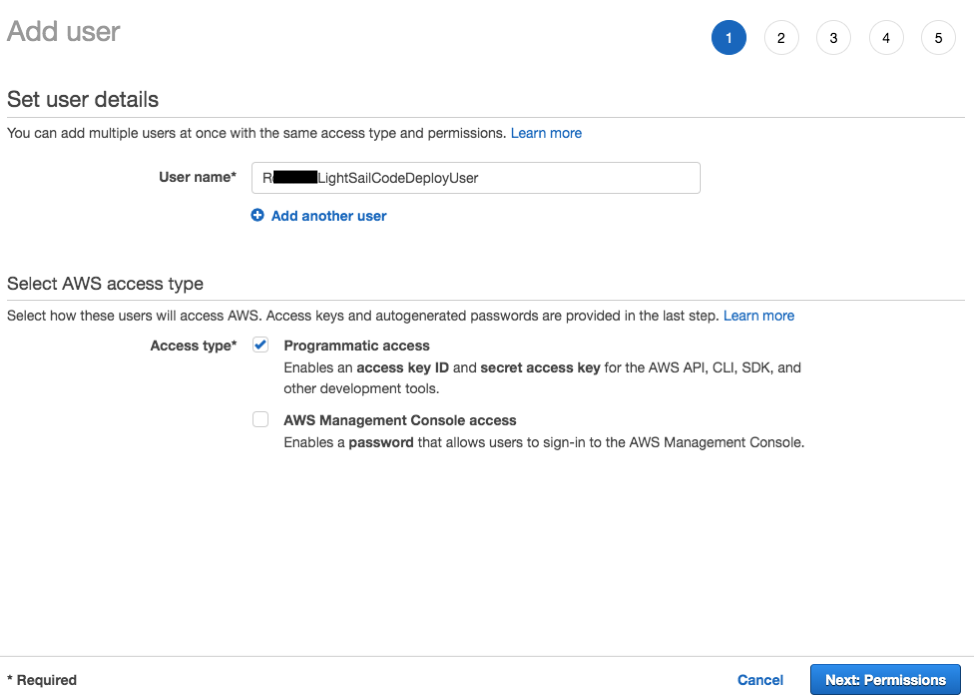
- Click Attach existing policies directly. Enter the policy name you have created earlier (
RxxxxCodeDeployS3BucketPolicy), and click the checkbox next to it. Click Next until IAM User is created.
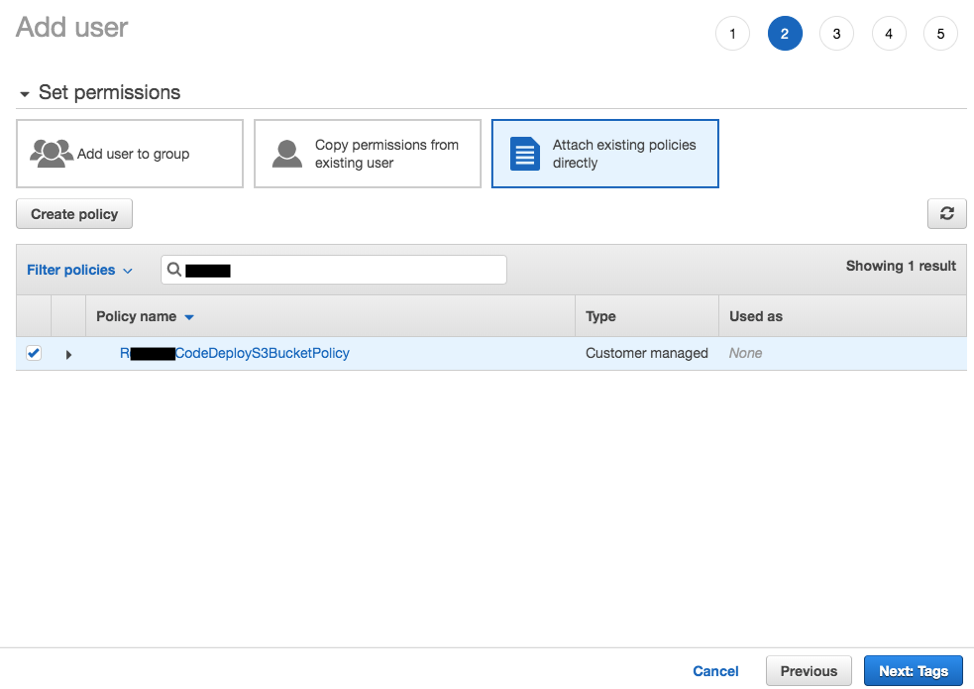
- Click Show in the Secret access key column. Copy your Access key ID, and Secret access key and paste it in your
SetupVariables.txt. Click Download .csv, and click close.
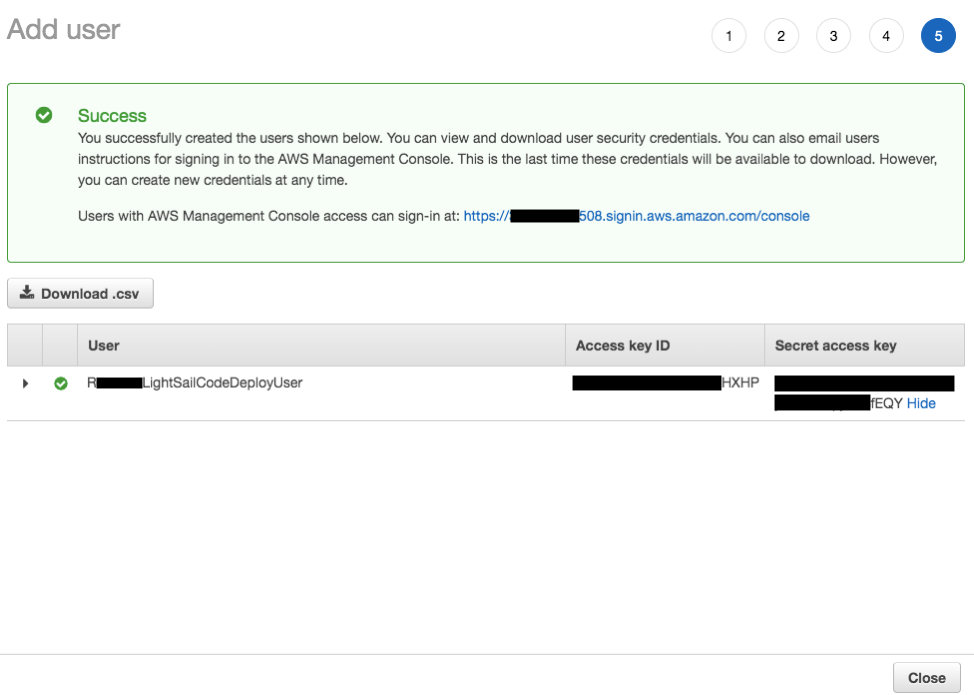
- Click on your newly created IAM User. Copy the User ARN and paste it in your
SetupVariables.txt.
Create a Lightsail Instance
- Navigate to Lightsail home page in the AWS Management Console, and Create an Instance by clicking create instance.
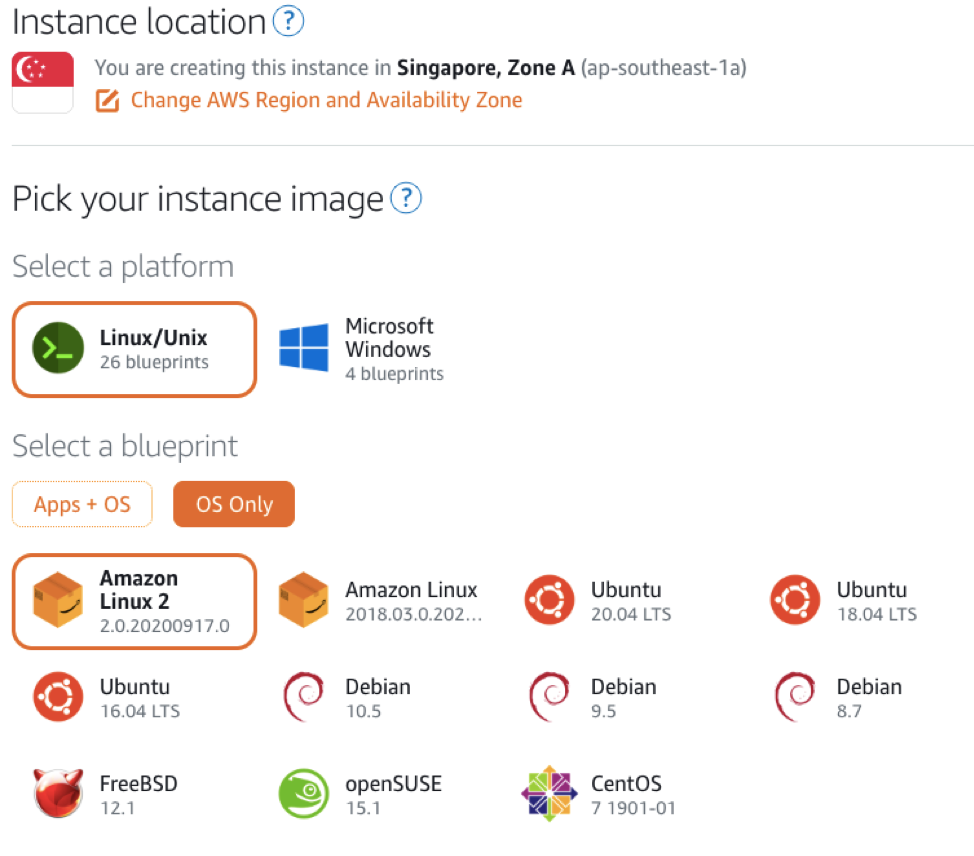
- Pick an Instance Location (ap-southeast-1a in this example). Select Linux/Unix Platform, and Amazon Linux 2 Blueprint from OS Only tab.
-
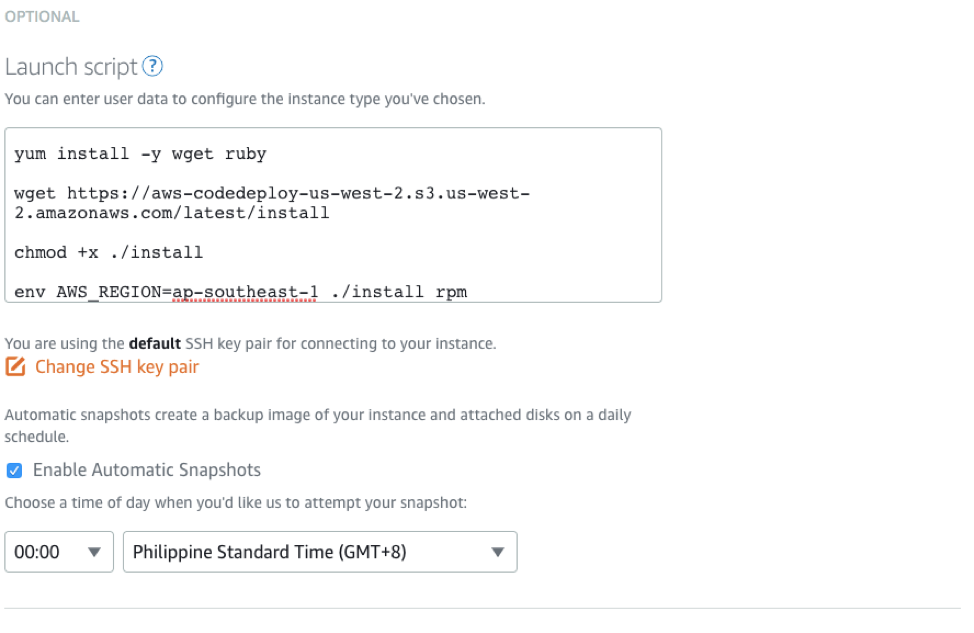
Scroll down and click + Add launch script. Input your Access Key ID, Secret Access Key, IAM USER ARN, and Desired Region (without the trailing ‘a’) in the code below.
1
2
3
4
5
6
7
8
9
10
11
12
13
14
15
16
17
mkdir -p /etc/codedeploy-agent/conf

cat <<EOT >> /etc/codedeploy-agent/conf/codedeploy.onpremises.yml
---
aws_access_key_id: your_access_key_id
aws_secret_access_key: your_secret_access_key
iam_user_arn: your_iam_user_arn
region: your_desired_region
EOT

yum install -y wget ruby

wget -N https://aws-codedeploy-us-west-2.s3.us-west-2.amazonaws.com/latest/install

chmod +x ./install

env AWS_REGION=your_region ./install rpm
- Click Change SSH Key Pair, and Download the default ssh key.
- Check the Enable Automatic Snapshots, and set timezone to PST, and to your desired time.
- Input your instance name under Identify your instance, and click Create Instance.
Verify the CodeDeploy agent
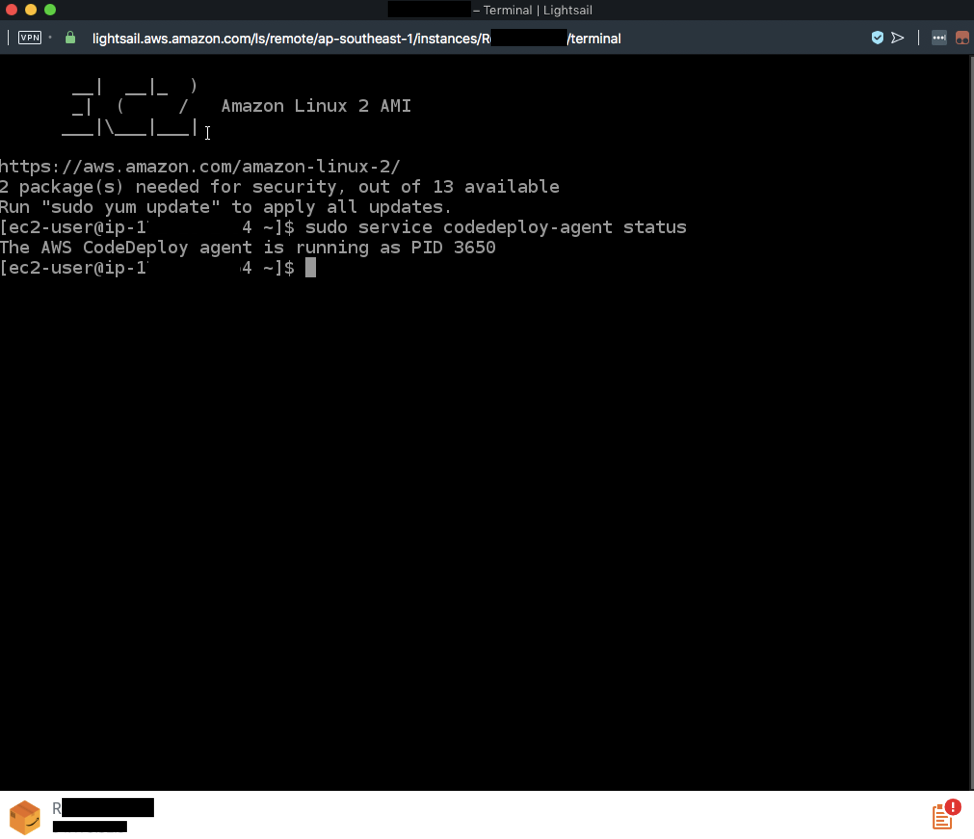
- Start an SSH session by clicking the terminal icon to the next of the name of your instance.

- Verify that the CodeDeploy agent is running by typing
1
2
3
sudo service codedeploy-agent status
# which should respond with: (the PID will be different)
# The AWS CodeDeploy agent is running as PID 3650
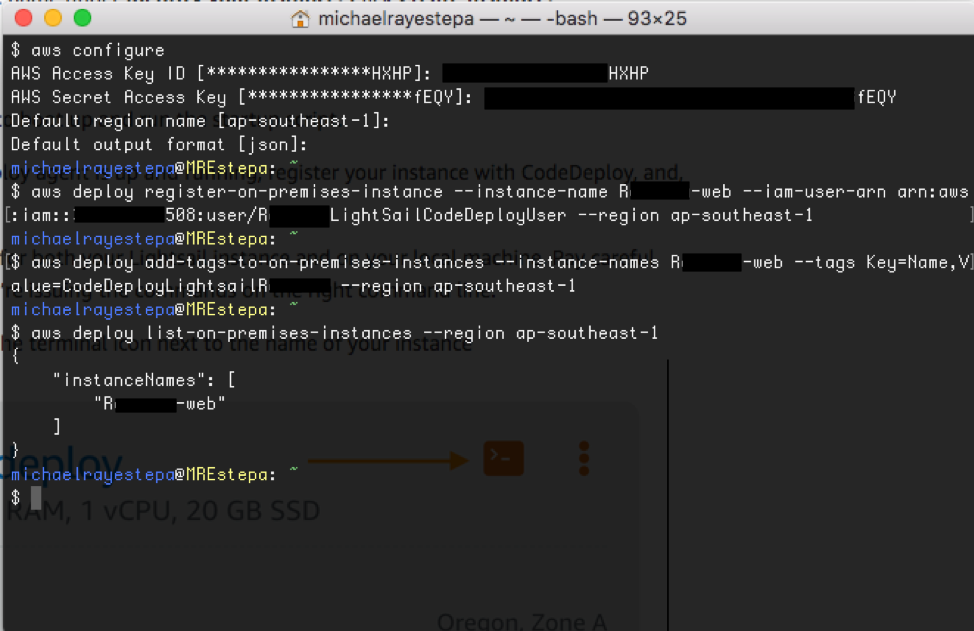
- Configure AWS in your local machine with the command
1
aws configure
and input your AWS Access Key ID, AWS Secret Access Key, Default region name, and Default output format as json
- In the code below, replace your_insance_name, your_iam_user_arn, your_region, your_key, and your_value, with your Instance name, IAM User ARN, Region, and desired Key (in this example,
Name) and Value (in this example,CodeDeployLightsailRxxxx), respectively:
1
2
3
4
5
aws deploy register-on-premises-instance --instance-name your_insance_name --iam-user-arn your_iam_user_arn --region your_region

aws deploy add-tags-to-on-premises-instances --instance-names your_insance_name --tags Key=your_key,Value=your_value --region your_region

aws deploy list-on-premises-instances --region your_region
and paste it in a terminal session in your local machine. The command should display an output like the one below:
1
2
3
4
5
{
"instanceNames": [
     "Rxxxx-web"
  ]
}
Setup the application in CodeDeploy
-
Navigate to CodeDeploy console and click Create Application.
-
Input your Application name (
RxxxxCodeDeployLightsailin this example), and under the Compute platform, select EC2/On-premises. Click Create application -
Click Create deployment group in the Deployment groups section, and enter your deployment group name (
RxxxxCodeDeployLightsailDeploymentGroupin this example) in the Deployment group name field. -
Click on the text box for Enter a service role, and click on the service role you created earlier.
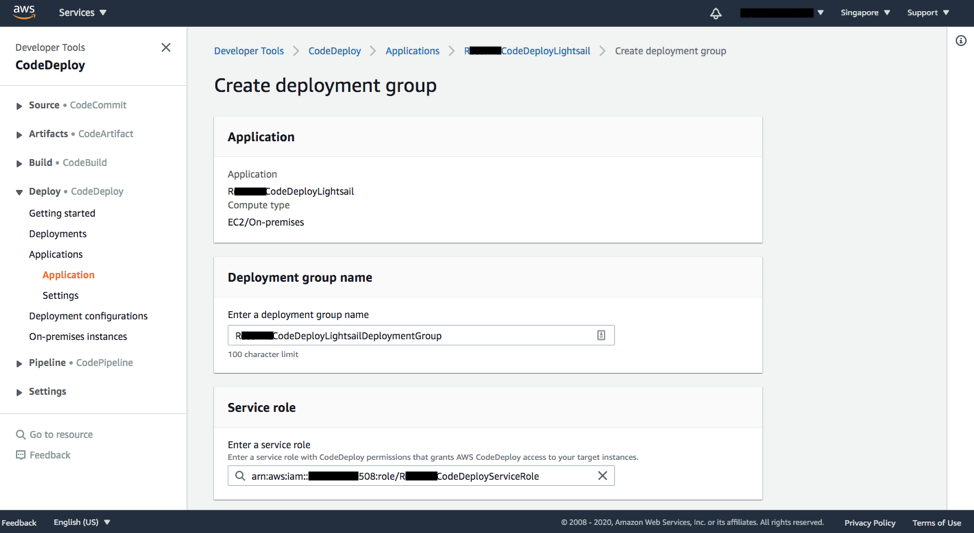
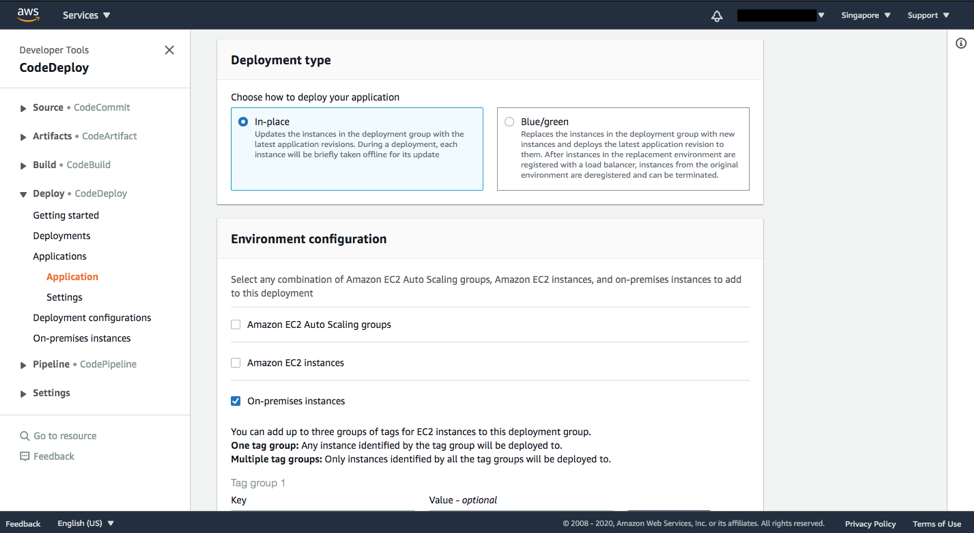
- Under the Environment Configuration, check On-premise instances, and enter your Key (
Name) and Value (CodeDeployLightsailRxxxx) you created earlier.
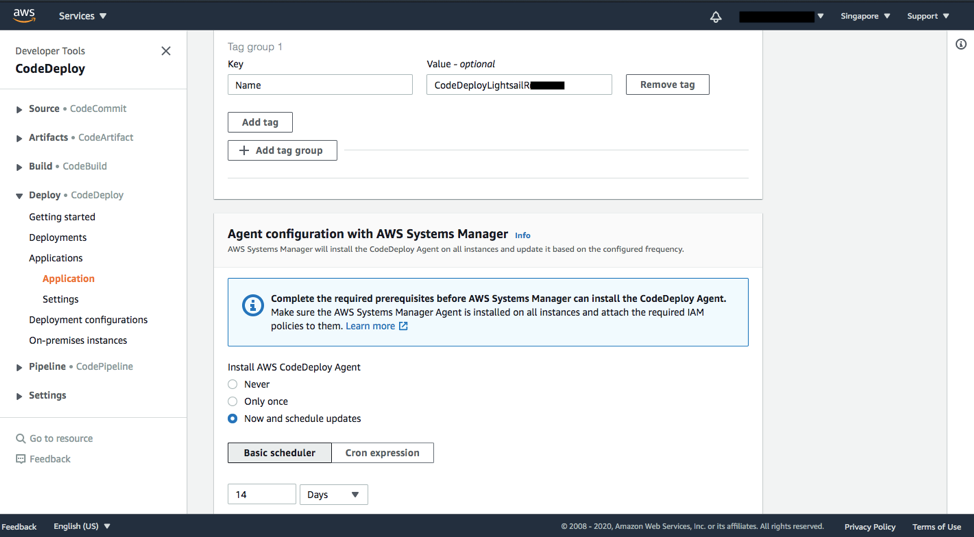
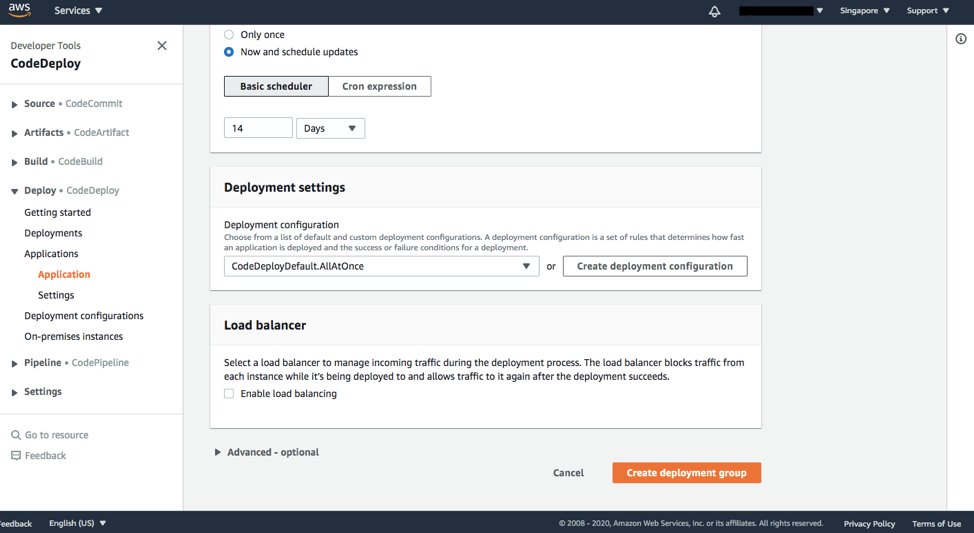
- Under Load balancer, uncheck Enable load balancing, and click Create deployment group.
Setup Bitbucket Repository
- Create a
scripts/directory in the root directory and create three (3) bash scripts namedinstall_dependecies,start_server, andstop_server. - Create an
appspec.ymlandindex.htmlfile in the root directory. - Navigate to the SetupBootstrap Gist and copy the codes from
BitbucketInitialization.txtfor the respective files.
Setup CodePipeline
- Navigate to the CodePipeline Console and click Create Pipeline.
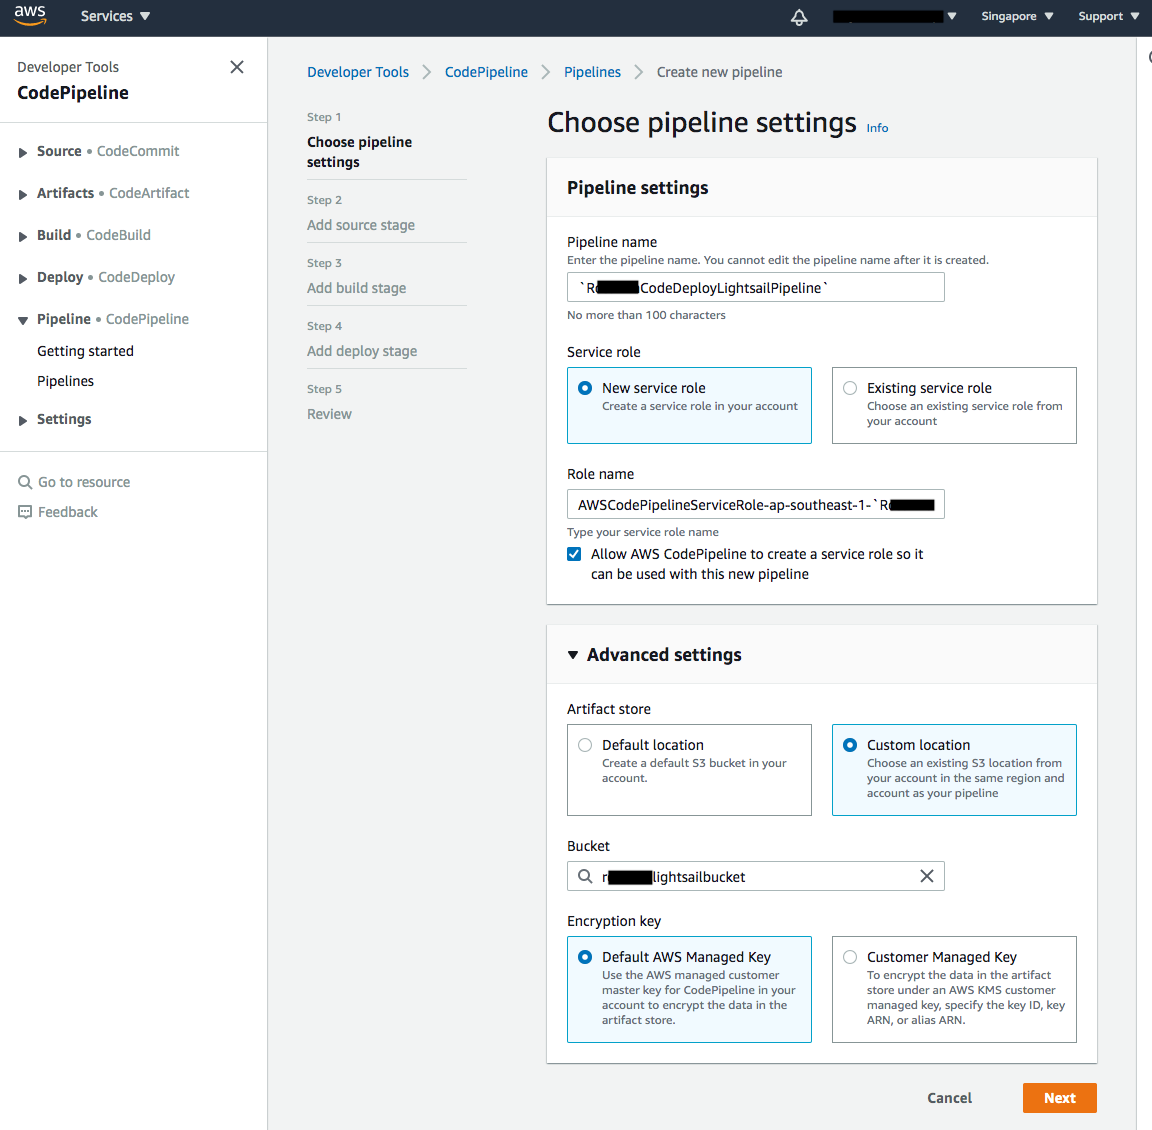
- Enter your your desired Pipeline name (
RxxxxCodeDeployLightsailPipeline) - On the Advanced Settings, click Custom location under the Artifact Store. Select the S3 bucket you created earlier in the Bucket textbox.
-
Click Bitbucket for the source provider, and continue to connect CodePipeline with Bitbucket
-
Enter your Repository Name and the Branch Name that you want to connect to pipeline. Click Next.
-
Skip Build Stage. Confirm Skip.
-
Choose AWS CodeDeploy from Deploy provider and make sure that the appropriate region is selected. For Application Name and Deployment Group, select the ones that you have created earlier.
Congratulations! You have created a CI/CD Pipeline with AWS CodePipeline, AWS CodeDeploy, Amazon Lightsail, and Bitbucket.